Overlayfile
The .overlayfile is a text file that clearly defines the structure and schema of a given overlay. The community uses it to define the overlays necessary for their use cases within their ecosystem. A clear definition allows for the easy sharing of this information within and outside of the specific ecosystem. Separating the overlay definition from its usage will allow for proper governance of both in the future and provide solid support for the tooling.
The overlayfile can be used to define the schema of a new overlay, allowing it to be composed into an overlayset and imported into oca-bin or other tools for validation purposes. This supports the process of creating bundles from .OCAFILEs. The Overlays ecosystem can use overlay registries consisting of .OCAFILEs containing definitions of such overlays to distribute them. This makes it easy to import and reuse these objects across different ecosystems.
Overlayfile in OCA Ecosystem
The overlayfile is mainly used for validation purposes and to support any community overlays in the OCA ecosystem. The definition is machine-readable and can be used to validate the overlay against the schema defined in the Overlayfile. This allows for the easy sharing of overlays across different ecosystems and provides a standardized way of defining and validating them.
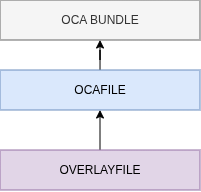
The diagram below shows the dependencies between Overlayfile, OCAFile, and OCA Bundle.
Benefits
- Out-of-the-box validation using standard OCA tooling.
- Custom overlays and community-driven overlay development
- Increase interoperability without sacrificing flexibility, allowing each ecosystem to define its own set of overlays.
Usage
The simplest way to start building an overlayfile is to use oca-bin, which provides validation and the ability to test it directly with OCAFILE.
Example use case
Assume we want to create an ecosystem leveraging the Overlays Capture Architecture (OCA) as a semantic layer for our data. No matter what form the data takes—whether it's complex research records, structured documents, or simple verifiable credentials—we always begin by defining the meaning of the data itself. Before creating any schema, we establish a governance process to set baseline rules, specifying which overlays, definitions, and conventions schema creators must use. This ensures that everyone in our ecosystem and other ecosystems can have a common understanding of the information being modeled. Once these rules are in place, individual contributors can create schemas tailored to specific use cases while remaining fully interoperable with each other. Since all participants adhere to the same overlay definitions, their schemas can easily be understood and processed using standard OCA ecosystem tools, enabling seamless parsing, transformation, and interaction across different domains.
The simplest way to start is to use baseline overlays from the OCA specification and extend them according to your needs. The core overlays can also serve as reference definitions, which simplify the whole process.
Now, let's create our first overlayfile.
ADD OVERLAY information
  VERSION 1.0.0
  ADD ATTRIBUTES language=Lang
  ADD OBJECT attribute_information
    with keys ATTR-NAMES
    with values TEXT
We can now validate it using the oca-bin tool.
> oca-bin validate -o information.overlayfile
If all goes well, we should see the following:
Validation Successful
Now that we are ready to use it in our OCAFILE, let's add it to our local overlay file registry. The command oca-bin config shows where the overlay definition path (overlay_definition_path) is located. Simply copy your file into that directory. For example:
> cp information.overlayfile $(oca-bin config | awk -F"'" '/overlay_definition_path/ {print $2}')
Now let's create OCAFILE with our new overlay, notice that META and CHARACTER_ENCODING are coming from core overlay definition and INFORMATION from our new overlay.
--name=bmi
ADD ATTRIBUTE first_name=Text last_name=Text wgt=Numeric hgt=Numeric

# Add meta data
ADD Overlay Meta
  language="en"
  name="Patient BMI"
  description="Standard 1 Patient BMI"

# Add character encoding
ADD Overlay CHARACTER_ENCODING
  attribute_character_encoding
    first_name="utf-8"
    last_name="utf-8"
    wgt="utf-8"
    hgt="utf-8"

ADD Overlay Information
  language="pl"
  attribute_information
    first_name="Imię pacjenta"
    last_name="Nazwisko pacjenta"
    wgt="Waga pacjenta"
    hgt="Wzrost pacjenta"
bmi.ocafile
Save the file and build using oca-bin build
> oca-bin build -f bmi.ocafile
You can now see the newly created OCA bundle in your local repository.
> oca-bin list
SAID: EPzk3xTq4q8zBwnRo-TC1rrvR_LVQOMCMjl6ij8hTkhI, name: bmi
if we inspect the OCA bundle, we should get the following:
> oca-bin get -s EPzk3xTq4q8zBwnRo-TC1rrvR_LVQOMCMjl6ij8hTkhI
{
  "digest": "ENZVf16tqGEYrsxtvKHWLqbFiQt0gxfJb5OyWtM7adGR",
  "capture_base": {
    "digest": "EHZSMO2EFsXy8r5XogQ381-VmOiTUQYjV3WNkBfWYaCH",
    "type": "capture_base/2.0.0",
    "attributes": {
      "first_name": "Text",
      "hgt": "Numeric",
      "last_name": "Text",
      "wgt": "Numeric"
    }
  },
  "overlays": [
    {
      "digest": "EEP2Ri2aoUO4eOyJ2YtakT3WYF5bNfox_6fGRo9wwPuy",
      "capture_base": "EHZSMO2EFsXy8r5XogQ381-VmOiTUQYjV3WNkBfWYaCH",
      "type": "meta/2.0.0",
      "language": "en",
      "description": "Standard 1 Patient BMI",
      "name": "Patient BMI"
    },
    {
      "digest": "EI-srXiraePymApfgooUGWpFnr-s4ZPMEtzbqCAxLG7L",
      "capture_base": "EHZSMO2EFsXy8r5XogQ381-VmOiTUQYjV3WNkBfWYaCH",
      "type": "character_encoding/2.0.0",
      "attribute_character_encoding": {
        "first_name": "utf-8",
        "last_name": "utf-8",
        "wgt": "utf-8",
        "hgt": "utf-8"
      }
    },
    {
      "digest": "ELKGKEF0EHl92SWtp2PobJ4i3hIMxT0i7IFeA6ISKoQd",
      "capture_base": "EHZSMO2EFsXy8r5XogQ381-VmOiTUQYjV3WNkBfWYaCH",
      "type": "information/1.0.0",
      "language": "pl",
      "attribute_information": {
        "first_name": "Imię pacjenta",
        "last_name": "Nazwisko pacjenta",
        "wgt": "Waga pacjenta",
        "hgt": "Wzrost pacjenta"
      }
    }
  ]
}